Go to WordPress to access all your WordPress installations.
In WP Toolkit, information about individual installations is grouped into sections called Cards.
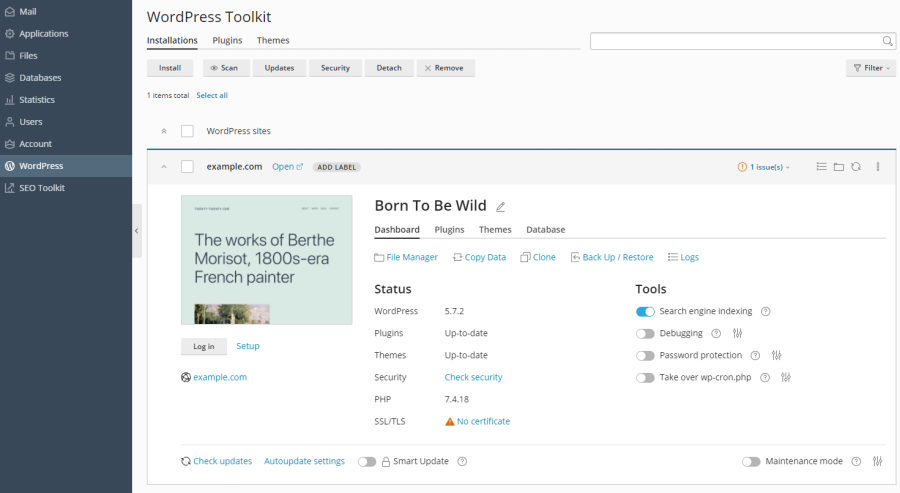
On a card, you will find a screenshot of the website and some controls that allow you to easily access commonly used tools. The screenshot shows real-time changes to your website. For example, if you activate maintenance mode or change the WordPress theme, it will be immediately reflected in the website screenshot.
When you hover over the website screenshot, you will see the following:
-
The Open Website button. Click it to open the website in a new browser tab.
-
Date and time of the last screenshot update. To update the screenshot, click the
 icon in the top right corner of the screenshot.
In addition, you can perform the following tasks:
-
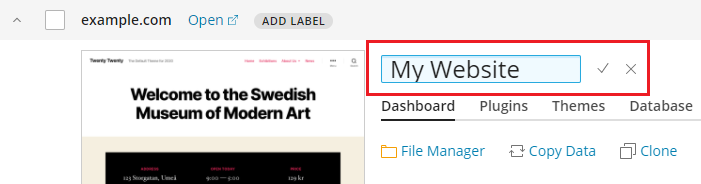
Change the name of the website. To do this, click the
 icon, enter a name for the website, and then click
  .
.
-
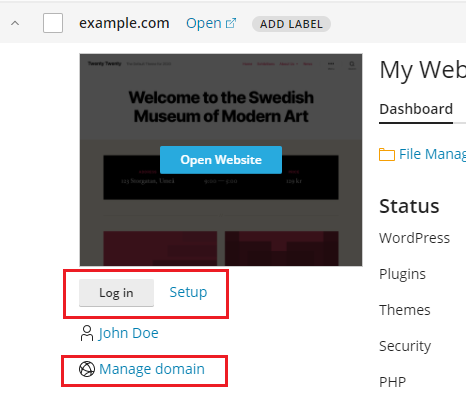
Log in as administrator in WordPress. To do this, click Login below the website screenshot.
-
Change general WordPress settings. To do this, click Setup next to Login.
-
Switch to the domain under Websites & Domains. To do this, click Manage Domain below the website screenshot.
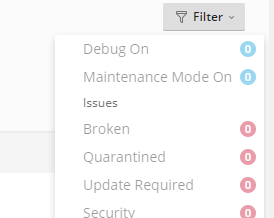
Status
WordPress websites are often targeted by hackers. Outdated versions of WordPress core, plugins, and themes also pose a security risk.
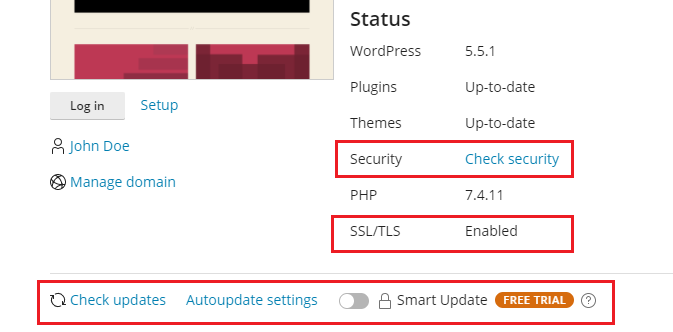
In the "Status" section, you can perform the following tasks:
-
Check if the WordPress core and installed plugins and themes are up to date, and update them if necessary.
-
Check if SSL/TLS is supported and, if not, enable it.
-
Assess the security of the website and increase it if necessary.
You can easily access the following settings and tools using the controls in the "Tools" section:
-
Search engine indexing: Include the website in search engine results
-
Debugging: Debug a website that is not yet published and is being tested or developed
-
Password protection: Set a password for logging in to WordPress via Plesk
-
Replace wp-cron.php: Schedule regular execution of
wp-cron.php
Under the "Status" and "Tools" sections, you will find the following WP Toolkit features:
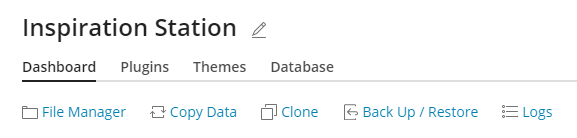
-
File Manager: Manage website files in the File Manager
-
Copy data: Copy website content to another website
-
Clone: Create a copy of the website
-
Backup/Restore: Create a backup of the website and restore it if needed
-
Logs: View WP Toolkit logs for troubleshooting
Below on the website map, you can do the following:
-
Enable Smart Update: Premium feature that keeps your production environment websites up to date without the risk of affecting websites with the update
-
Enable maintenance mode: Hide website content from visitors

On the remaining three tabs, you can manage the plugins and themes of the installation, as well as change the database username and password.
Website Labels
Website labels are preconfigured identifiers that you can assign to your websites, such as "Staging," "Production," "Test."
Depending on your project, you may host multiple copies of your website with different functions. Labels allow you to differentiate between the different versions.
By default, a website has no label. To specify one, click on ADD LABEL (on the website map next to the website name) and select the desired label. This is optional, and you can change or remove the label at any time.
![]()
Managing Card Views
You can define how cards are displayed in WP Toolkit. The default card view is ideal if you have only a few installations. If you manage many installations, you can minimize the cards ![]() .
.
Installations can also be filtered for easier management.
Removing and Detaching Installations
If you no longer want to see and manage a WordPress installation in WP Toolkit, you can detach it. This will hide the installation in WP Toolkit without removing it. A detached installation will be automatically added back to WP Toolkit when you perform a new search for WordPress installations. You can detach WordPress installations individually or in batches.
To detach WordPress installations:
- Go to WordPress and perform the following steps:
-
Detach an individual installation: Click the icon
 on the installation card that you want to detach.
 -
Detach multiple installations: Select the installations that you want to detach and click Detach.
-
- Click Detach.
Unlike detaching WordPress installations, removing them will delete them completely. Installations can be completely removed regardless of whether they were installed via WP Toolkit, the "Applications" page, or manually. You can remove WordPress installations individually or in batches.
To remove WordPress installations:
- Go to WordPress and perform the following steps:
-
Remove an individual installation: Click the icon
on the installation card that you want to remove. -
Remove multiple installations: Select the installations that you want to remove and click Remove.
-
- Click Remove.
Search Engine Indexing and Debugging
By default, a newly created WP Toolkit website is included in search engine results. If your website is not intended for the public yet, disable "Search Engine Indexing."
If you install WordPress for text purposes or website development, you can enable the option "Debugging" to automatically find and fix errors in the website code. To do so, click the icon ![]() next to "Debugging" and select the WordPress debugging tools that you want to enable. Then click OK.
next to "Debugging" and select the WordPress debugging tools that you want to enable. Then click OK.